Monday 1 August 2016

Sausage Bun

I am in a really good mood today.. Something to look forward to! Can't share for now tho;p

It's baking time when it's happy time! Yesterday I went to Chinatown, and I walked past this bakery and I saw all the bread. Wanted to buy hotdog buns but thought why not try bake them by myself.

So, after much research, I decided to try the 'tangzhong' method since its known for making soft and fluffy bread. Came across 'Christine's recipes' and thought what an interesting method so here it is...


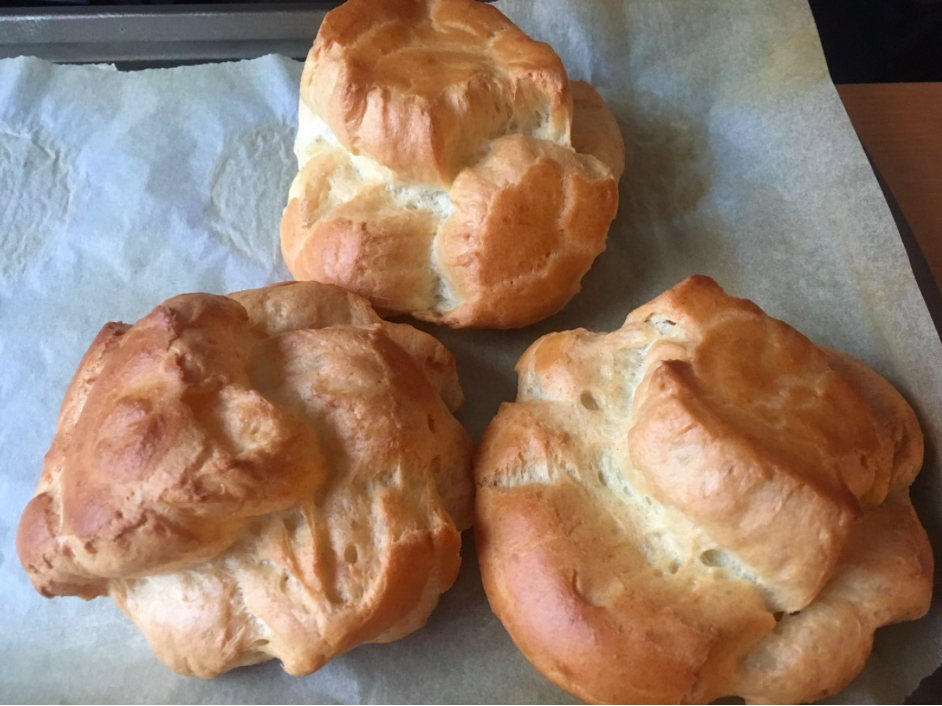
I agree that it does not look very nice... but its actually very soft... like really really soft...
The dough ,unlike normal bread, is very very sticky even though you knead and knead and knead it. it was kind of annoying for me because i can't stand things sticking to my hand all the time.  Ya ya ya... i should have used a bread maker or dough mixer. Where is the fun of baking then? The sense of satisfaction is different for me... So, no machine for me!

Ingredients

For the 'tangzhong:

- 50 gm strong bread flour
- 250 mls of water

Stir and cook on medium heat until it turns into glue-like texture.


For the bread:

- 350gm strong white flour
- 50 gm sugar
- pinch of salt
- 1 large egg
- 1 sachet instant yeast
- 125 mls full-cream milk
- 7 gm milk powder
- 120 gm tangzhong
- Bowl of sugar water

Method:

1. Mix all the dry ingredients.

2. Once tangzhong is cool, whisk with milk and egg till smooth.

3. Mix wet and dry ingredients and knead for 10 minutes on a lightly floured surface. The dough will remain very sticky but you will be able to tell the difference when it is less sticky if you knead it by hand.

4. Let it poof for about an hour, till double in size.

5. Remove the air then divide into equal pieces, your preferred size. Let poof for 15 minutes.

6. Roll each dough into long strips, wrap around hotdog. Let poof for another hour until double in size.

7. Bake at 160 for about 30 minutes.

I personally do not like to use egg wash for my bread as I find they brown too quickly in the oven. To achieve that glossy effect, brush the bread with sugar water once out of oven. on top of the glossy look, the sugar water also gives the bun its much needed tint of sweetness.

I did not have enough hotdog so ended up using the leftover dough to make a loaf.

Enjoy~~~


Sunday 10 July 2016

Choux Bun

Today is a sad day for me.... I am supposed to be on a holiday but due to some reason, I did not make it. So I decided to bake bake and bake! Baked some 'choux' bun to 'shoo' the bad luck! Fortunately for me, the choux buns all came out great! Came across a video on a blog by Dulce Delight and thought her technique is quite interesting.

So while my friends were on the plane flying to my long-awaited holiday destination, here is what I have made.


Before

After
    
Hugeeeee......


Pate Choux

- 250gm water
- 110gm butter
- pinch of sugar
- 140gm plain flour
- 4 to 5 eggs

Method

1. In a pot, mix in water, butter, sugar and bring mixture to a boil.

2. Remove pot from heat. Stir in flour and mix well.

3. Return pot to medium heat and continue to stir till dough no longer stick to the side of the pot.

4. Remove from heat and let it cool completely.

5. Once completely cool, mix in one egg at a time and whisk vigorously.

6.When you lift up the whisk and the dough drops from the whisk then the dough is ready ( usually around 4 to 5 large eggs). Dough should look silky and smooth but not too watery. When you pump it out of the party bag, it should hold its shape.

7. Bake the choux pastry at 220 degrees celsius for 30 mins(brown) then keep the door of the oven slightly open and lower the temperature to 150 degrees celsius and bake for another 10 mins (this will allow the humidity in the pastry to escape)


Creme Patisserie

- 240gm heavy cream
- 100gm sugar (split into two)
- 4 egg yolks
- 40gm corn starch
- 120gm full fat milk
- Vanilla extract

- 200gm heavy cream

Method

1. Bring heavy cream, 50 grams of sugar and milk to a boil. Remove from heat.

2. Whisk egg yolk with remaining sugar till pale. Mix in corn starch and whisk till combined.

3. While whisking the egg mixture, pour half of the hot cream (tempering) into the yolk mixture. Continue mixing till well combined. Make sure the egg yolk does not coagulate.

4. Mix the rest of the cream and stir well on medium heat for 3 minutes until the mixture thickens.

5. Let cool completely.

6. Whisk remaining heavy cream till stiff. Do not over whisk as it will turn into butter-like texture.

7. Fold the cooled custard into the whipped cream.


I decided to add some strawberry puree into my Creme Patisserie and glazed the top of the bun with some good quality dark chocolate. Yumssss....

Tuesday 5 July 2016

Croissant


Making pastry is hard work. A lot of PATIENCE is needed! But the satisfaction you get afterwards is indescribable. The method in making puff pastry and croissant pastry is the same. The difference is that puff pastry does not contain yeast.

My several attempts at making croissant had been disappointing. They did not 'poof' like they were supposed to. And in order not to feel the disappointment again, I never tried since then.

It was the last few days of Ramadhan and one of my friends mentioned having pastry for Iftar (break-fast) but I only had bread at home so I thought why not try making Croissant! Make them all fat fat! This time with British ingredients! I googled for a good recipe, and came across one posted by Paul Hollywood (the male judge in The Great British Bake-Off). And that's it!

Overnight in the fridge, and 2 hours of proofing in room temperature


Ingredients

- 500gm strong white flour
- 10gm salt
- 80gm sugar
- 10gm instant yeast
- 300ml cool water
- 300gm butter


Method

1. Mix all dry ingredients and water. Knead till smooth. Wrap loosely in cling film and chill in fridge for 1 hour.

2. Shape butter into think rectangular shape.

3. Remove dough from fridge and roll out as wide as butter and double the length of the butter. The aim here is to wrap the butter in the dough nicely.

4. Do at least 3 turns. Roll out dough and fold into three as if closing a book. Make sure to chill the dough at least 1 hour between each turn.

5. Chill the dough overnight or for at least 8 hours.

6. Remove from fridge and roll out dough into long rectangular shape, roughly 0.5cm in thickness.

7. Cut the rolled out dough into equal triangles. Make a 1cm slid at the centre of the base of the triangle. Roll the dough tightly.

8. Let proof for 2 hours in room temperature and then bake at 200 degrees celsius for 12-20 minutes till golden brown.


I personally do not like to egg wash my croissant because I notice they brown faster without cooking through. That is just personal preference.

Baked till golden brown


Tuesday 21 June 2016

Sarawak'ian Laksa


There are many types of Laksa. Sarawak'ian Laksa is my favourite. It is not as 'coconut-y' as Nyonya Laksa and it is not as 'fishy' as Penang Laksa. It has this very strong aroma which comes from the boiling of shrimp shells for hours..

It is relatively easy to prepare, although can be laborious. So, my advice is to get a good friend (makan kaki) to give you a hand in the preparation. Otherwise, by the time yo finished preparing, you would have lost your appetite to the exhaustion from the preparation.

So, I cheated. I used Laksa paste! I knowwwww.... I should have prepared my own... buttttt it is so troublesome..... So, I always use the 'Swallow Brand' Laksa paste as recommended by my granny. My granny sure makes lovely Laksa- spicy and spicy...

To make it tastier, I decided to add some rempah to the laksa paste. And YES, I prepared the rempah... How hard can it be? Just grind some lemongrass, onion, chilli, turmeric, ginger and a bit of oil in a blender. BUT,  ENJOY cutting them...

Saute the rempah and laksa paste till fragrant and set aside.


The laksa paste can be very oily...


Then, boil a big pot of water, blanch the shrimps with shell on till just-cooked. Make sure to submerge the cooked shrimps into ice water so the shrimps will not be rubbery. Remove the shells and put the shells back in the water. DO not throw away the shrimp heads. Those are the most flavourful bits. Then add a whole chicken and let it cook on low heat for 2 hours, or until you can see the flesh of the chicken fall apart from the bones.


The soup looks oranges because of the shrimp

Remove the chicken from the soup and set aside to cool. Remove the shrimp shells from the soup and add the laksa paste. Let it boil while stirring occasionally. Add salt to taste.


You can prepare the condiments as you like. I prepared some shredded chicken, sliced cucumber, vermicelli and bean sprouts. I only remembered the omelette when all my party buddies have arrived so I did not bother.


Hard work pays off


Just mix everything!


Steamed Taro Cake (Wu Tao Gou)


My favourite snack especially pan-fried! Sinful? Arghhh who cares~~~~ The steamed ones are sinful too.... At least my version does not contain lap-cheong (chinese sausage). In my opinion, lap-cheong makes it slightly sweet, and I prefer the savoury kind of wu tao gou so just shallots and dried shrimp is good enough for me.

I remember my Mom used to make them regularly at home when I was a kid. I remember her version being a little dry (too much taro). And I used to enjoy those that I bought from the shops, failing to realise that those were full or starch instead of taro. The ratio of starch to yam is probably like 5:1? Now I understand why those store-bought wu tau gou are so soft!

I also remember Mom gets frustrated whenever she finds the top of the cake very soft and the bottom very stiff. So, the trick here is to cook the flour mixture with the yam before steaming it. Imagine mixing the flour in cool water and adding the yam into it. the mixture is kinda cool. It takes time for the whole mixture to get cooked in the steaming pot. While steaming i the pot, the flour sinks to the bottom of the pan and hence the stiff bottom.


Ingredients

- Approximately 600gm of taro, peeled and cut into small cubes

- A handful of dried shrimps, soaked and chopped

- 5 shallots, chopped and fried till golden brown

- 250gm rice flour

- 2 tbsp tapioca starch

- 2 tbsp wheat starch

-1 chicken stock cube, dissolved in 800 mls water

- Salt, to taste

- Ground pepper, to taste


Method

1. Deep fry taro till slightly brown and fragrant, set aside.

2. Deep fry shallots till golden brown, set aside.

3. Mix water and chicken stock cube and stir till fully dissolved. Add salt and pepper.

4. Heat some oil in pan and stir fry dried shrimp till fragrant and add in shallots. Add in taro and stir       till well-combined.

5.Lower heat and add in the flour mixture and continue stirring till it becomes a paste (should take about 5 minutes).

6. Grease a baking pan with oil and place the cooked mixture into the pan.

7. Steam till cooked. Insert an toothpick into the centre of the cake. If the stick comes out clean, the cake is cooked.

TIP: Make sure you occasionally stir the flour mixture(before adding into yam) to prevent the flour from sinking to the bottom.

Pan-fried with LaoGanMa chilli... Yums..


Tuesday 17 May 2016

Lo Bak Gou (Turnip Cake)


Lo Bak Gou reminds me of my late grandpa. I remember he would always ask me to make this and then cut them into cubes, pan fry them till crispy and then stir fry with belacan and chilli padi. He had one of those 'very old' heavy-bottomed wok and it was damn 'siok' to cook with one of those! My aunts and cousins would all gather together and finish the whole dish. Then, we would all go to the beach behind my grandpa's and play Rounders (just to burn off the calories);p


Its basically made of rice flour, corn starch and turnip. You can add any fillings you like.  For my version, I added dried shrimp and spring onions. You can add chinese sausage if you like but I usually don't because some of my friends don't eat pork (definitely gonna share this).

I don't really know the ratio of rice flour to water because I usually just go by instinct. But I think my method is quite simple. My mom would just mix everything in a pan and steam it. Often the cake came out with a super sticky and soft top and a very stiff bottom. That is because when you mix any flour in water and leave it to stand, the flour will sink to the bottom.

So after some research, I decided to cook the flour before I steam the cake as suggested by some bloggers( I don't really remember who as I have read through too many).

Let me try and recall the measurements for the ingredients roughly ;)

Ingredient

- 600 gm of turnip, grated finely
- 300gm rice flour
- 2 tbsp corn starch (Do not omit this as it makes the cake soft)
- Roughly 3 cups of water
-Some chopped spring onion
- Some chopped dried shrimp
- Salt and pepper


Method

1) Mix water, rice flour, corn starch, salt and pepper in a bowl. Stir occasionally to make sure flour does not sink to the bottom. Be generous with salt and pepper. Taste it. The last time i ate raw flour I didn't die so make sure you taste yours to make sure it's tasty.

2) Heat some oil in a pan. Stir fry dried shrimp and spring onion till fragrant. Add in grated turnip and mix well.

3) Once fragrant, add in flour mixture and stir. Mixture will thicken. This is where I usually go by my instinct. You don't want the mixture to be too stiff (cake will be hard as rock). On the other hand, you don't want it to be too watery. Stir for roughly 2-3 minutes. Mixture should be easy to stir and spread over steaming pan. If mixture gets too stiff, just add more water and stir till the consistency you want.

4) Oil a non-stick pan, pour in mixture and steam over medium heat for 30-40 minutes.

5) Insert a satay stick (alternatively you can use a chopstick) in the centre of the cake, if the stick comes out clean, the cake is cooked. Let cool for 30 minutes.

Enjoy!

NOTE:
If you remove the cake half-cooked and try to cook it again, it WILL NOT work! So, make sure cake is cooked before removing from heat.


Fried Lo Bak Gou with belacan... Siok ah....


Monday 9 May 2016

Scones


The original recipe was adapted from Mary Berry so I am assuming that these are english scones. To make it sound healthier, I have added some fruits, flaxseed and even wholemeal in my version of scones. I guess you are more willing to eat them with clotted cream and jam now...hehe...


Yummy


Ingredients

- 200g self-raising flour
- 50g ground flaxseed
- 1 rounded tsp baking powder
- 40g cold butter
- 25g sugar
- 1 large egg
- Less than 100mls of milk


Method

1) Mix together flour, ground flaxseed and baking powder.

2) Rub the butter into flour till it resembles bread crumbs, stir in sugar and set aside.

3) Whisk one egg and add milk to make 100mls, keep 1 tbsp as egg wash.

4) Mix milk mixture to flour and mix well.

5) Roll out gently and cut into desired shape and size.

6) Egg wash and bake at 200 degree celsius for 10-12 minutes.


Note:
Do not over knead else it will turn into bread.
Do not twist when cutting else the sides will not rise evenly.
Do not let egg wash drip on the sides.

Scones are ready! Where are my high-tea buddies???!!!

Saturday 7 May 2016

Polo Bun

The word 'polo' means pineapple in Cantonese. I am guessing it got its name because its crust resembles the skin of the pineapple as it does not contain any pineapple at all.

Its a tea-time favourite in Hong Kong. The people would toast the bun and sandwich it with thick slices of cold butter, and of course a cup of the famous milk tea. How sinful?

Before going into the oven

How bootiful is that!


Ingredients

Note: Recipe was adapted from The Woks of Life

For the Bun:

- 160 mls heavy cream
- 240mls + 1 tbsp milk
- 1 egg
- 65 g sugar
- 70 g cake flour
- 490 g strong white flour
- 1 tbsp yeast
- 1 1/2 tsp salt


For the crust:

- 35 g milk powder
- 175 g all-purpose flour
- 1/2 tsp baking soda
- 1/4 tsp baking powder
- 125 g extra fine sugar
-  50 g shortening
- 1 egg yolk
- vanilla
- 2 tbsp milk ( I used 4 tbsp)


Method

For the bun:
 
1) Combine all ingredients and knead till smooth and not sticky (about 15 minutes).

2) Cover with damp cloth and let it proof for 1 hour (Dough will double in size).

3) After one hour, gently knead dough to release air.

4) Shape into desired shape and size.

5) Place dough on a non- stick baking pan and let proof for another hour.

6) While dough is proofing, mix all the ingredients for the crust and mix to combine.

7) Roll out crust and place on top of bun dough (first picture).

8) Brush with egg wash and bake for 10-13 minutes on 180 degrees celsius.


It's hard work but in the end it's all worth it! Look at the enjoyment on the face.


Yummmm


Monday 2 May 2016

Hokkaido Cupcakes


It's Spring! And yet it snowed 2 days ago... and yes it snowed in London... I guess that's why people always say the english weather is very unpredictable;p

We are having a gathering at a friend's house tomorrow.. Boodle fight.. This is the first time I have heard of this boodle fight thingy. Apparently the cooked food are placed on banana leaves which is placed on a super long table.. and guests would have to FIGHT to get to the food. Of course I am joking! Guests will eat together on the table...

Since the owner of the house had been whining about not having the chance to taste my version of the hokkaido cupcake, I decided to make some for the gathering..


It's kinda difficult but relatively easy to make these cupcakes. There are some serious techniques involved here. Folding of the meringue for instance. Fold it in ONE direction and be GENTLE.

Ingredients

Part A:

- 6 egg yolks
- 40 g sugar
- 80 mls milk
- 80 mls oil
- 120 g cake flour

Part B:

- 6 egg whites
- 80 g sugar

Method:

1) Hand whisk yolks and sugar till pale.

2) mix in oil, milk and flour and whisk till combined.

3) Whisk egg white and sugar till firm peak.

4) Fold B into A.

5) Bake at 150 for 20-25 minutes or till slightly brown.

Tip: When you lightly touch the top of the cake and it bounces back, it means its ready.


No time to brush hair and wash face... Boodle fight it is!


one more for luck...;0


Saturday 30 April 2016

Peanut Ball (Lo Mai Chi)


Decided to make some 'peanut balls' today. In London, the outside of these balls are usually covered in desiccated coconut and they are usually HUGE.

My version, on the other hand,  is smaller and simpler. I added some flaxseed in the peanut filling so I could tell ma friends that these are healthier when compared to those sold in the oriental shop. The truth is who doesn't like homemade goodies, right?

My mission is to make people around me fat...hehe...


What a mess! Haha


Makes about 15 small ones

Ingredients:

- 250gm glutinous rice flour
- 400 mls water
- 3 tbsp sugar


For the filling:

- Toasted peanut, roughly chopped
- Sugar
- Flaxseed (optional)

There is no measurement for the filling because different individuals prefer different level of sweetness. Please adjust the level of sweetness to your liking.

Method:

1) Mix flour, water and sugar.

2) Steam for 30 minutes and give it a stir then steam for another 30 minutes.

3)  Once cooked, the dough will appear opaque.

4) Mix it slightly and brush a layer of oil to prevent it from drying up while its cooling.

5) When completely cool, roll out  dough (not too thin else it will break) and wrap in filling.

6) Dust with some cooked rice flour and serve.


Preparing cooked rice flour

There are 2 ways to prepare cooked rice flour:

1) Microwave the rice flour for 30 seconds each time for 6 times. Remove from microwave and stir well each time. You will feel the flour getting lighter and more fragrant.

2)Using a non-stick wok, stir flour on low to medium heat for 30 minutes. Ensure that you are constantly stirring the flour to prevent it from getting burnt. Similarly you should feel the flour getting lighter and more fragrant.


NOTE:
The dough is very sticky when it is not properly cooled. Unless you do not mind the mess.....;p

Enjoy!


Happy faces :)